Jan 29, 2026
Connect your Bolt app to QuickBooks using Pica AuthKit
Build financial products in Bolt using this simple QuickBooks integration.
Educational

You can build some pretty complex apps and tools with Bolt these days, including functional finance products.
In this guide, we’ll walk through how to build a finance product in Bolt that pulls customer and invoice data from your users’ QuickBooks accounts.
Fundamentally, a good finance tool requires two things:
A clean UI your users understand instantly
A secure, multi-tenant way for users to connect their own QuickBooks
Establishing that secure connection is exactly what Pica AuthKit is for. It handles the OAuth flow, token refresh, and “who connected what” identity plumbing so you can focus on fine-tuning the product itself.
What you’ll build
By the end of this walkthrough, you’ll have:
A simple finance dashboard UI in Bolt
A “Connect QuickBooks” button that opens AuthKit
A multi-tenant connection flow (each user connects their QuickBooks)
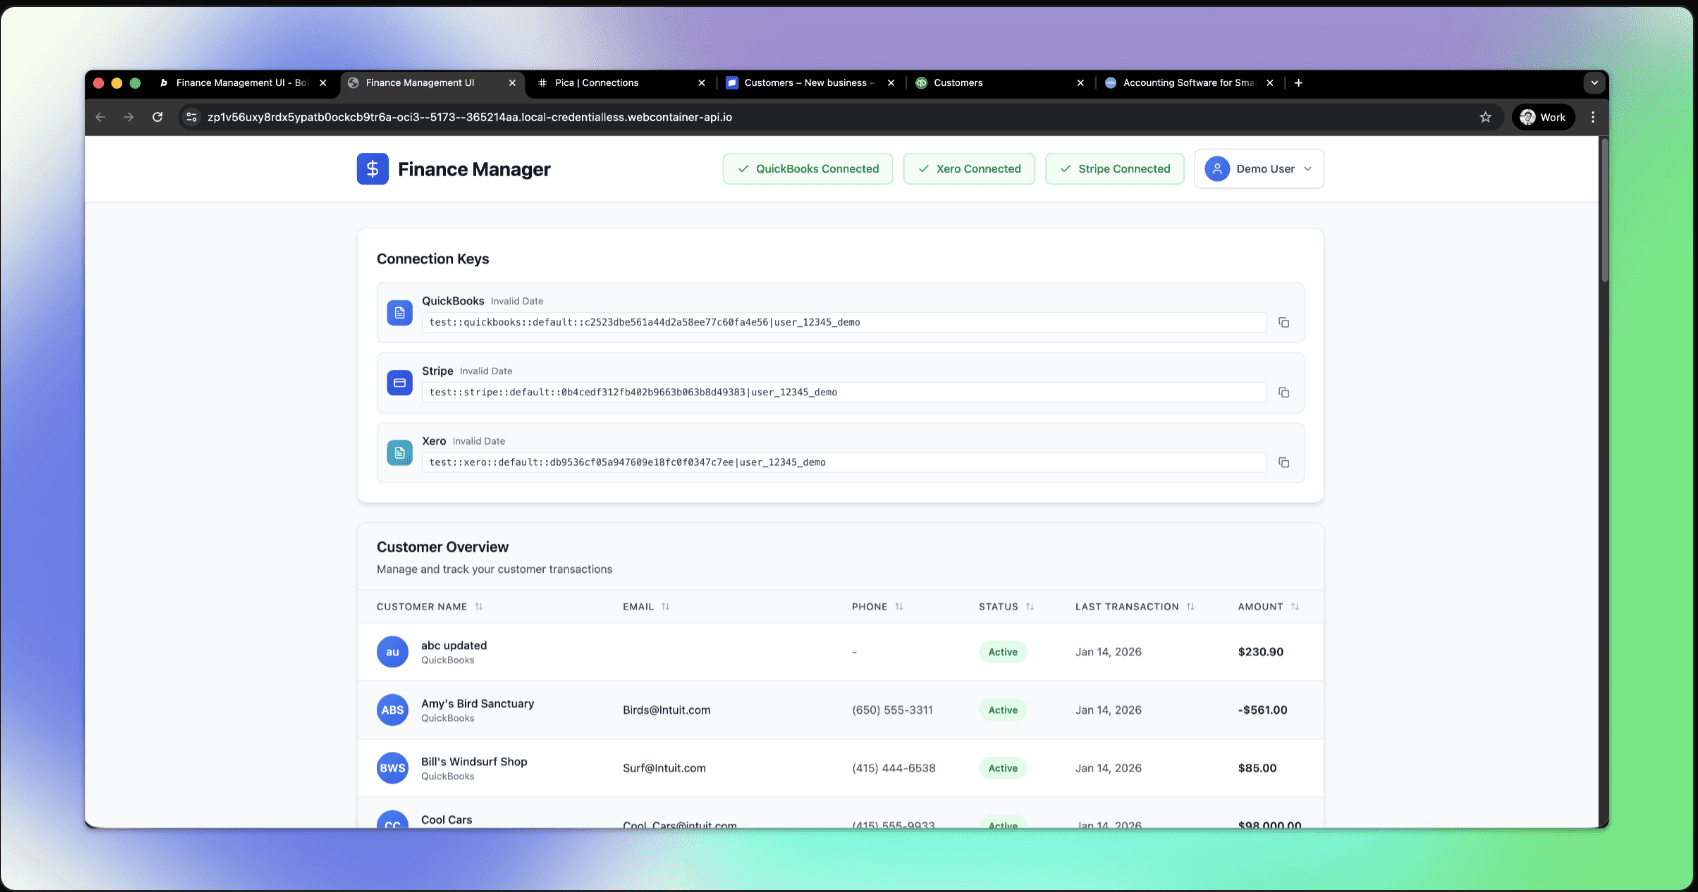
A Customers table populated from QuickBooks
An Invoices view (e.g., click a customer → see invoices)
Before you start
You’ll need:
A Bolt project
A Pica account (for AuthKit + BuildKit)
A QuickBooks developer app (for OAuth credentials)
QuickBooks OAuth redirect URI (important!)
When you create your QuickBooks OAuth app, set the redirect URL to:
https://app.picaos.com/connections/oauth/callback
This is the callback Pica uses to complete the OAuth flow.
Step 1: Build the finance dashboard UI in Bolt
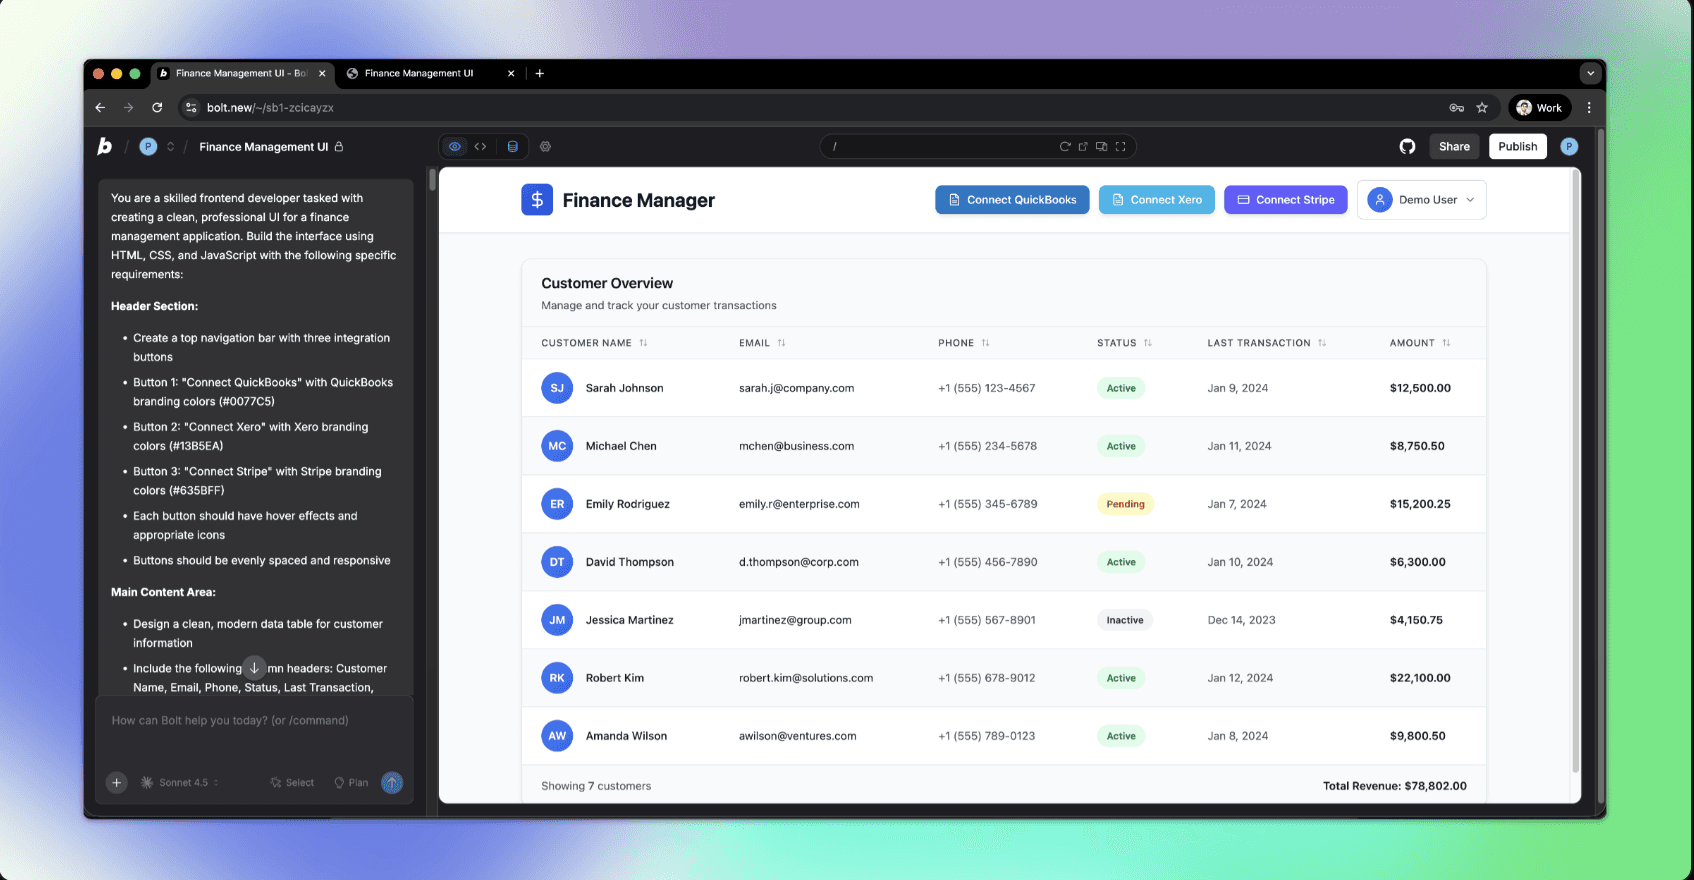
In Bolt, start with a clean dashboard: one integration button + a table.
Prompt:
Design a clean finance management dashboard.
 Include a top-level “Connect QuickBooks” button and a table to display customers (name, email, company, last updated).
 Add authentication and show the logged-in user’s ID in a profile dropdown.
 Prioritize clarity and simplicity.
Bolt should generate:
A page layout
Auth + a user identity you can reference (critical for multi-tenant connections)
A table ready for real data
Step 2: Add Pica AuthKit (so users can connect QuickBooks)
Next, we’ll add AuthKit so your users can connect their own QuickBooks accounts.
Prompt:
Integrate Pica AuthKit into this Bolt app so logged-in users can connect their own integrations.
 Requirements:
Add a backend endpoint that generates an AuthKit token for the currently logged-in user (use their userId as the identity).Add the AuthKit modal to the frontend and open it when the user clicks “Connect QuickBooks”.On success, store the created connection details for the current user (so the app can fetch data later).Handle success + error states in the UI.
Add your Pica secret in Bolt
In Bolt:
Settings → Secrets
Add:
PICA_SECRET_KEY = <your key from Pica dashboard>
Restart the app after saving.
Step 3: Enable QuickBooks inside Pica AuthKit
In the Pica dashboard:
Go to AuthKit
Enable QuickBooks
Add your QuickBooks Client ID and Client Secret
Confirm the redirect URI is set to:
https://app.picaos.com/connections/oauth/callback
This controls what users see inside the AuthKit modal and which OAuth app is used.
Step 4: Connect QuickBooks (and test the OAuth flow)

Click Connect QuickBooks in your app.
Two pro tips from the live build:
1. Test in a real browser tab (not the Bolt preview)
AuthKit uses a secure OAuth flow and can behave weirdly inside nested previews/iframes.
Open your Bolt project in its own browser window to test end-to-end.
Chrome local development gotcha
If you’re developing locally in Chrome and the modal doesn’t open properly:
Go to
chrome://flagsSearch Local Network Access Checks
Set to Disabled
Step 5: Fetch QuickBooks customers (via Pica BuildKit)
Now the fun part: pulling real data from QuickBooks.
In Pica BuildKit, generate a prompt for:
“List customers from QuickBooks for the currently logged-in user”
Then paste the generated prompt into Bolt along with a small instruction that tells Bolt where the data should go.
Prompt:
Add customer fetching from QuickBooks using Pica.
 When a user has a connected QuickBooks account, fetch their customer list and render it in the customers table.
 Use the connected account for the current user (multi-tenant), not a hardcoded connection key.
 Include loading + error states.
What you’re aiming for:
A server-side function that calls Pica using the current user’s connection
A frontend call that loads customers on page load (or on button click)
A table that updates cleanly
Step 6: Show invoices (click a customer → view invoices)
Next, fetch invoices for a selected customer.
In Pica BuildKit, generate something like:
“List invoices in QuickBooks for a customer”
Then wire it into Bolt UI.
Prompt:
When a user clicks a customer row, navigate to a customer detail page (or open a side panel) and fetch QuickBooks invoices for that customer.
 Use the current user’s connected QuickBooks account via Pica (multi-tenant).
 Display invoice number, status, date, total, and balance.
Protip: Solving the “missing credentials” error
A common pitfall is accidentally wiring invoice fetching to a static credential instead of the user-scoped connection.
If you see errors like “missing credentials,” it’s actually a very easy fix. Just make sure the invoice call is using the logged-in user’s connection context. Same pattern as customers.
Troubleshooting
AuthKit modal doesn’t open
Confirm
PICA_SECRET_KEYis set in Bolt SecretsOpen the app in its own browser tab (not the embedded preview)
Check console errors
OAuth flow fails
Confirm redirect URI is exactly:
https://app.picaos.com/connections/oauth/callbackConfirm your QuickBooks OAuth app credentials are correct in Pica AuthKit
Confirm required scopes/permissions are enabled in QuickBooks
Customers/invoices don’t show up
Confirm the connection is being saved for the logged-in user
Confirm you’re fetching data using the current user’s identity-scoped connection
If you see weird response parsing issues, check whether the upstream response is XML vs JSON and ensure your request headers accept JSON
Take Bolt + Quickbooks to the next level
Once customers + invoices are flowing, you can take things a step further pretty easily.
Here are some additional projects you can tackle using the foundational work we’ve already done:
Invoice creation from inside your Bolt app
Vendor bills + payables view (who you owe, how much, due dates)
AI-driven transaction categorization (bookkeeping, but actually modern)
Multi-integration expansion: add Xero, Stripe, or more finance platforms with the same pattern
Got an idea for a nifty finance product? Built it in Bolt.


